Showing posts with label Recipes. Show all posts

Jul 26, 2011

Kefir Blueberry Coconut Cake & Picking Too

The blueberries are out! After a really BAD season last year due to a late spring frost, this years wild blueberry crop is amazing!! Check out these clumps of berries, they almost look like high bush.
Not a great photo because it was taken with my phone but after only 2 hours of picking we came away with over 25 cups of berries! You can see the amount of berries still left on the bushes in the blurry background.

What to do with so many blues?

Eat them of-coarse!


Kefir Coconut Blueberry Cake
  • 2 cups flour
  • 1 cup sugar
  • 3 teaspoons baking powder
  • 1/4 teaspoon salt
  • 1 1/4 cup shredded coconut
  • 2 eggs
  • 1 1/4 cup milk kefir
  • 1/2 cup coconut oil
  • 2 cups fresh (or frozen) blueberries

Lemon Glaze:
  • 1 cup powdered sugar
  • 2-4 tablespoons lemon juice (or enough to make a smooth glaze)
  1. In a bowl, combine the flour, sugar, baking powder, salt and 1/2 cup coconut. In another bowl beat the eggs, kefir and oil; stir into dry ingredients just until moistened. Fold in blueberries.
  2. Spread in a greased and floured 13x9 baking dish. Sprinkle with the rest of the coconut. Bake at 350 degrees for 25-30 minutes or until done. Cool on a wire rack.
  3. In a small bowl combine powdered sugar and lemon juice. When cooled slightly drizzle the glaze over the cake and serve!

Jul 15, 2011

Citrus Rhu-berry Jam and Roadside Foraging

The kids and I set out to walk "the loop" the other day and ended up with 2 cups of wild berries! We just happened to come upon this small patch of blueberries on the side of the road and so we stopped for some spur of the moment picking!

Then to our surprise, we also came upon a nice patch of wild raspberries!! What a treat! With the cost of berries so high we picked all we could. This patch popped up in the past year or two in a new development down the road from us. A great place to look for berries because they are usually found in areas that have recently been cut or cleared.
The kids we so HOT but helped mama pic anyway! I think James is eating one in this pic instead of plopping them into our empty water bottles!! Caught!!!
We did have to improvise to come up with berry picking containers since we did not think to bring one along. We guzzled these two waters down to make room for the berries.
I had made plans to make rhubarb jam with a friend later that week. After searching for just the right recipe and realizing I did not have the right ingredients for any of them I came up with this recipe. It came out sooooooooo good that I am planning on making another batch very soon!


Citrus Rhu-berry Jam

6 c. fresh or frozen rhubarb, chopped
4 c. sugar
1 clementine (or a small orange), juiced and rind chopped into very thin small slices
1 c. fresh raspberries
1 c. fresh blueberries
3 oz. pkg. strawberry gelatin

In large kettle combine rhubarb, sugar, juice, and rind. Let stand 15 to 20 minutes or till sugar is moistened. Bring to a boil and continue to boil uncovered for 10 minutes, stirring often. Add raspberries and blueberries; return to boiling. Boil hard 5 to 6 minutes or till thick, stirring often. Remove from heat. Add gelatin; stir till dissolved. Ladle into hot, clean jars, leaving 1/4 inch head space. Wipe jar rims; adjust lids. Process in boiling water bath for 15 minutes. (Start timing when water boils.) Or if you're brave like me tip the jars over for 5 minutes then return them to the upright position instead of a water bath. Makes 5 to 6 half pints.

Apr 19, 2011

Easy Homemade Yogurt Method!


Thought I would share this method of making yogurt that we've been using for the last month or two. I have been wanting to make yogurt for YEARS now and was slightly intimidated by it, until I realized it really is so simple! Here's what we do:

In the morning I set a dishcloth in the bottom of a pot and then fill (to a little below the screw lines) 4 pint jars with milk. Then the jars are placed in the pot and I add water to about the same level as the milk. Place it on the stove, turn it on high, add a thermometer and go about making breakfast or cleaning up from dinner last night...oops!
You are looking for the milk to reach 180 degrees.


Also a thin film will form on the top of the milk.


When up to temp remove the jars from the water to cool down to 110 degrees. You can do this by either letting them sit on the counter (it will take several hours) or setting them in the sink or dishpan and slowly adding cool water so the jars do not break!!! (Oops again!) It will only take 30 minutes or so if you are wanting to speed up the process. I let them cool for a few minutes and then set them in a dishpan and added cool water slowly and then cold water and then ice cubes. Add more ice as necessary. Do NOT set the jars directly into ice water! Not good for your jars!!!

Meanwhile, I placed the cover on the pot I used for heating the milk and left it on the burner with the heat turned off. This is going to be my heat source for keeping the yogurt warm.


When the yogurt is down to temp I added 1 tablespoon of plain good quality store yogurt (used Stonyfield) to each pint and gave it a gentle stir until the yogurt was thoroughly mixed in. Next I screwed the caps on and place the pot of water and the jars in my cooler with a towel for extra insulation. I wrap the towel over everything and close the lid. The yogurt needs 4 to 24 hours to culture. I did not time how long they were in the cooler but that night before bed I opened it up and placed the jars in the fridge.


The next morning you have yummy homemade (and easy to my surprise) yogurt that you can add any type of flavoring to! The kids and I have been loving maple syrup and granola on ours!
Love the fact that I have almost no dishes with this method too! Just the measuring spoon I used to measure out the yogurt and stir with. The pot of water I dump and dry and put away since it only had water in it. My dishcloth is now completly sterilized and clean so I hang it up to dry. I have also now started using quart jars instead of pints since the kids eat this for breakfast almost every day!!!

Jun 18, 2010

A Cool Idea for a Hot Summer Dinner!

Searching for something new to have for dinner the other night I came across an idea for meatloaf on the grill! I read trough it and thought it was such a great way to have a home cooked, "comfort food" supper without heating up the kitchen!

Everyone has their own meatloaf recipe... but this is ours, all the kids and Daddy eat it! So it gets 5 stars!!!!!

"Grilled" Turkey Meatloaf

  • 1 pound ground turkey (or beef, we switch back and forth depending on what we have)
  • 1 egg
  • 1 cup bread crumbs
  • 1/4 grated cheese (we use parm or cheddar or both)
  • 1/4 cup finely chopped onion
  • 1 Tablespoon Italian seasoning
  • 1 cup ketchup (any tomato sauce will work but we like the little bit of sweetness the ketchup adds)
  • 2-4 Tablespoons BBQ sauce (for the top)
Pre-heat your grill to medium heat. Mix all ingredients (except BBQ sauce) in a large bowl, I use my hands for this because it seems to be faster and easier to feel for any lumps. Once everything is combined press it into a glass pie plate and top with BBQ sauce. When your grill is ready set the pie plate on a cookie sheet in the grill and close the lid. It will take about 30 minutes for the meatloaf to cook. Watch the heat so it doesn't get too high, I found that I had to turn off all but one burner to maintain medium heat.

The kids were not sure about this at first, I think because it looked different from the usual. I told Emmy that it was just a giant burger and she said "Oh! I love burger" and ended up having seconds! We all really enjoyed it and the way our kitchen was still cool! We will definitely make it this way again!!

We also have discovered how much we like ground turkey in our meatloaf (and lots of other things) instead of ground beef. It gives it a really nice flavor! You must try it if you haven't yet!


Enjoy more great recipes at the Grocery Cart Challenge recipe swap and Foodie Friday!


May 21, 2010

A Mother Daughter Tea Party, Scones, and Clotted Cream

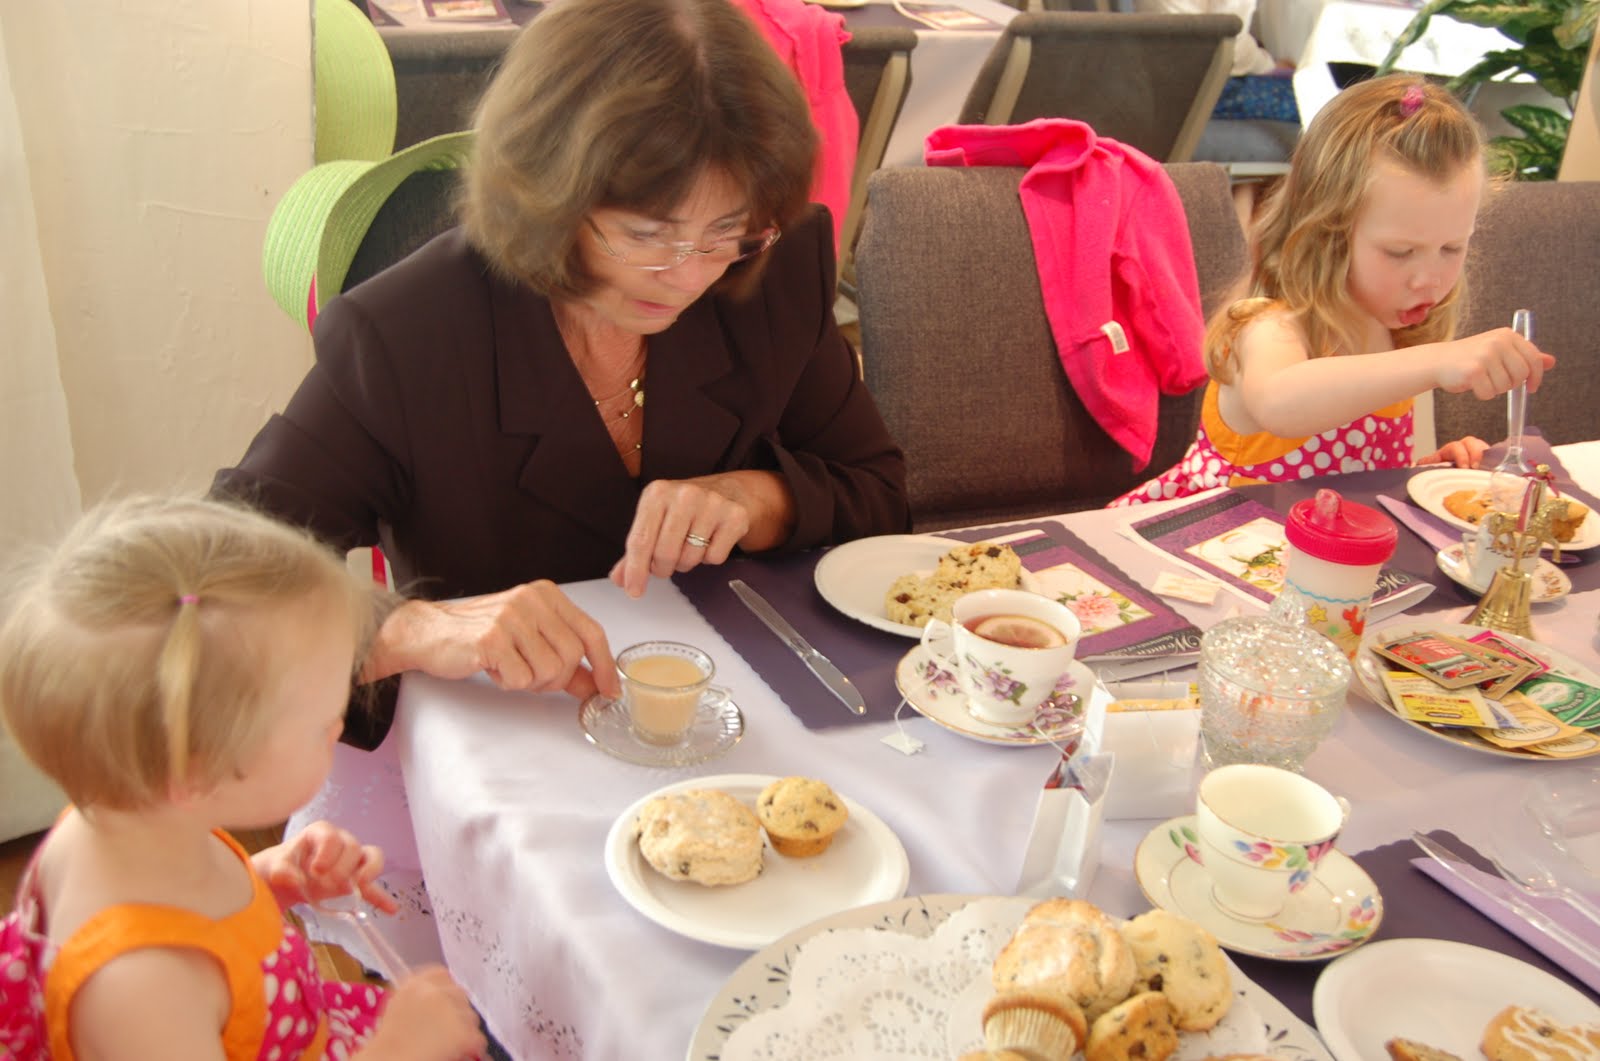
We had such a fun time last Saturday at out church attending the Mother Daughter Tea! It was great to break out all the fancy tea pots and cups and actually use them not just look at them!!

Along with our tea we enjoyed scones, tea sandwiches and lovely desserts! Here Mollie and Emmy are enjoying their snack with Mimi:
Emmalie did well and stayed pretty clean!
Mollie on the other hand was a different story!!!
Here the girls are posing with Mimi, only Mollie was too interested in smooshing her face to smile pretty!
And pulling her hat over her eye's!

Emmy wanted to ham it up a little too!!!

We were able to get this photo of 4 generations of my family together, the only one missing was my sis who had to leave early! I was so nice to spend the afternoon with them.
These are Glazed Orange Currant Scones!
I chose to bring these to go along with our tea, it's a great recipe I got off the back of a wheat germ label. I love the light orange flavor in the scone itself and the glaze!
Scroll down for the recipe:
Scones
1/2 cup currants
1/4 cup orange juice

1/4 to 1/2 cup fat-free milk as needed
1 3/4 cups all-purpose flour
2/3 cup wheat germ any flavor
1/2 cup granulated sugar
1 Tbsp. baking powder
2 tsp. orange peel
6 Tbsp. cold butter
1 Egg lightly beaten

Glaze
1/2 cup powdered sugar
1 to 1 1/2 Tbsp Orange juice as needed

Heat oven to 375°F. Lightly spray cookie sheet or baking stone with cooking spray.
In small bowl, combine currants and 1/4 cup orange juice; let stand 10 minutes. Drain and add
enough milk to orange juice to equal 1/2 cup.

In large bowl, combine flour, wheat germ, granulated sugar, baking powder and orange peel; mix
well. With pastry blender or two knives (I find it works best to just use your fingers) cut in vegetable oil spread until mixture resembles coarse crumbs. In small bowl, combine egg and juice-milk mixture; blend well. Add to dry ingredients all at once; stir with fork just until dry ingredients are evenly moistened. (Do not over mix.) Gently stir in currants.

Turn dough onto lightly floured surface; knead gently 8 to 10 times. Pat dough into 8-10 inch circle
on cookie sheet. Cut into 8 (or more depending on how big you want them) wedges; separate wedges slightly. You can also use the drop method by using a large scoop or spoon to drop them onto the cookie sheet. Sometimes it depends on the consistency of your dough, very soft = drop, soft to firm = pat and cut.

Bake 18 to 20 minutes or until golden brown. Remove to wire rack to cool. In small
bowl, combine powdered sugar and enough orange juice for desired consistency; stir until
smooth. Drizzle over warm scones. Enjoy!


After attending a tea at a friends church and trying clotted cream for the first time I knew I really wanted to try to make it to go along with the scones! The recipe sounded easy, it just needed quite a bit of time. We started off with 2 quarts of Sherman Farm heavy cream in a big kettle.

You then let that sit in the oven for 10 -12 hours on the lowest setting possible (mine was 170 degrees). Then you remove it from the oven and skim off the strange looking yellow skin layer and place it in the fridge covered with a towel for 8 hours. At that time you should be able to skim off the "clotted cream" layer from the liquid layer below.

This is what we ended up with, not a lot for each table but just enough for everyone to try on their scones. It was a big hit!
It reminds me of the way heavy cream tastes if you beat it past the whipped cream stage but not quite to butter. A little sweet, a little buttery, and a little creamy!This is where I got the recipe from if you want to read more about making clotted cream:
The Cupcake Project

Check out the Grocery Cart Challenge recipe swap and Foodie Friday for more yummy recipes!

May 7, 2010

A Dandy (lion) of a Day!

We had a great time the other day collecting dandelions to try our hand at making jelly! I have had a recipe for Dandelion Jelly in my "want to try" file for several years now! My friend decided to make it and it came out yummy so we were off together to make another batch (or 3)! It was a beautiful day and the kids really enjoyed gathering the flowers and running through the field!
We then all went home to face the important task of cutting the flower petals away from the green stem so that none of the milky white stuff ended up in our jelly ( it is very bitter).

The kids were such great helps! They cut and cut and cut!!! They had a blast pretending to have a dandelion barber shop!

Even Emmy sat and diligently snipped away.
The jelly came out tasting so yummy! Like a lemon honey!! Here is the recipe that we adapted from this one at Recipe Zaar:

Dandelion Jelly

Ingredients:
  • 8 cups of lightly packed dandelion petals (use only yellow petals and very little green or the milk in the stems will make the jelly bitter)
  • 4 tablespoons lemon juice
  • 7 cups sugar
  • 1 (1 3/4 ounce) package pectin
  • 1 teaspoon vanilla

Directions:

Start by steeping the petals in 7 cups of boiling water for 2 hours, or try the quicker method of boiling for 10 minutes and then let the mixture cool. We used the longer method. When done strain the mixture using cheesecloth. You need to have 6 cups of liquid. In a deep kettle bring to a rolling boil the liquid, the lemon juice, and the pectin. Add sugar then stir and boil hard for 1 1/2 minutes, or until mixture sheets from a metal spoon. Remove from heat and add vanilla. Pour into hot clean half pint jelly jars and seal. We flipped the jars onto the lid for 10 minutes to seal them and it worked great! This should make about 9 half pint jars.

Check out the Grocery Cart Challenge Recipe Swap and Foodie Friday for more yummy recipes!

Apr 23, 2010

Cream of Wheat Pancakes

We have been enjoying this pancake recipe for a couple of months now as a change of pace to our usual recipe! The Cream of Wheat also provides an excellent source of iron as an added bonus!
To start out add to a large mixing bowl:

3/4 cup flour

1/2 cup Cream of Wheat (uncooked)

2 T. sugar

1 T. baking powder

1/2 tsp. salt

1/4 tsp. cinnamon

Then add the wet ingredients:

1 egg

1 cup milk

2 tsp. oil

Then let the kids beat with a wire whisk until well blended, then let the mixture stand for a few minutes (about 5) before cooking.
Then pour the batter onto a hot griddle or skillet and cook until the top looks bubbly then flip and brown the other side.

The kids and I really enjoy these! We double the recipe to make sure we have enough!! I really like the texture and the slight cinnamon flavor. If you add blueberries they taste just like blueberry muffins!


They get a thumbs up from the kids!!!


Check out the Grocery Cart Challenge Recipe Swap and Foodie Friday for more great recipes!

Apr 3, 2010

Easter S'more

Easter S'mores!???!!!

1 chocolate bunny
2 blue peeps
+ 2 graham crackers

= YUM!!!


Loving all the food pics on this site called foodgawker! Check it out HERE.

Mar 20, 2010

Daddy's Dulce de Leche Cheesecake


On a RARE night out on the town for just the two of us we had stuffed ourselves with dinner and were not thinking so much about dessert until Pat saw they had Dulce de Leche Cheesecake on the menu and said he MUST try it! It was oh so delicious and rich and caramel flavored! We asked for the recipe but the waitress was unsure? He decided then and there that was what he wanted for his birthday cake! I searched on line and here is what I came up with which I adapted from a Rachel Ray recipe:

Dulce De Leche Cheesecake

Ingredients:
  • 1 pkg. Pecan Shortbread Sandies (by Keebler)
  • 2 tablespoons brown sugar
  • 1/2 teaspoon salt
  • 4 tablespoons unsalted butter, melted
  • Two 8-ounce packages cream cheese, at room temperature
  • 3 tablespoons flour
  • 2 large eggs plus 1 large egg yolk
  • 1-3/4 cups dulce de leche or other caramel sauce (click HERE or HERE to see how to make your own)
Preheat the oven to 350°. Wrap the outside of a 9-inch springform pan with foil. Using a food processor, finely chop all but 6 of the cookies (save these for garnish of just eat:-), then add the brown sugar and 1/4 teaspoon salt. Add the butter and pulse until just combined. Press into the bottom of the prepared pan and bake until set, 10 to 12 minutes. Transfer to a rack to cool. Lower the oven temperature to 300°.

Using a mixer, beat the cream cheese until softened, 2 minutes. Beat in the flour and remaining 1/4 teaspoon salt on low speed. Beat in the eggs and egg yolk, 1 at a time, on medium speed. Mix in 3/4 cup dulce de leche or caramel sauce.

Pour the batter into the crust. Loosely cover the pan with foil, set in a roasting pan and pour in enough boiling water to reach a depth of 1 inch. Bake the cheesecake until set at the edges but slightly wobbly in the center, about 60 minutes. I uncovered the cheesecake during the last ten minutes or so. When the cook time is up shut the oven off and let it sit for 1 hour in the oven with the door slightly open.

Spread 3/4 cup dulce de leche over the cake. Refrigerate until ready to serve, then remove the springform and slice the cheesecake. Once sliced garnish with whipped cream and then drizzle with leftover dulce de leche (if you haven't eaten it yet)! You can then crush the remaining cookies (if they haven't fallen to the same fate) and sprinkle them over the top!

WARNING: This cheesecake is very sweet! Everyone thought it was yummy but only Pat dared to have more than one piece!


Happy Birthday Daddy! We love you!!

Check out Foodie Friday for an amazing spring salad recipe and more!

Mar 5, 2010

Tex-Mex Meat Pie

This recipe is adapted from a Pillsbury cookbook I have called Budget Ground Beef Recipes. It originally used frozen meat balls but Pat and I both agreed that it sounded icky, so I decided to modify it! Check out the recipe below!

INGREDIENTS
1pie crust (I used a Jiffy box mix because I was in a hurry!)
1/2 lb. ground beef (I added a small diced onion to this while cooking)
1cup corn frozen, fresh, or canned
1
cup salsa
3/4cup shredded Cheddar cheese (3 oz)

shredded lettuce

sour cream


DIRECTIONS

Heat oven to 375°F. Cook ground beef and diced onion until no longer pink and season with salt and pepper. Roll out pie crust onto a round pizza pan or cookie sheet to form a large circle. Spread ground beef mixture in the center of the crust leaving a couple of inches around the edge.

In small bowl, mix corn and 1/2 cup of the salsa. Spoon the corn mixture over the ground beef and sprinkle with 1/2 cup of the cheese. Fold edge of crust over filling, leaving an opening in the middle.

Bake 35 to 40 minutes or until crust is deep golden brown. Sprinkle with the rest of the cheese. Bake 3 to 5 minutes longer.

We used lettuce, sour cream, and the remaining salsa as topping!
It came out really good! It maybe could have used a little more spice in the ground beef mixture? But got Daddy's seal of approval!!


Since the crust mixture made 2 crusts we wrapped up the rest and used it the next morning to make homemade poptarts! My friend and I decided this would be a fun thing to make since our kids really like them! Check out her post here.

Yum!

Check out the Grocery Cart Challenge Recipe Swap for more yummy recipes!

Mar 3, 2010

Snowman Cupcakes

Selena and I had ton's of fun making these cute cupcakes yesterday! They are another idea from the Hello, Cupcake! book that we are determined to work our way through some way or another!

As soon as I put mouths on them they looked as if they were saying,
"Please NO, please don't eat us!!"

"Oh NO! Here they come!!!"

Without a face though they were still cute but far quieter!! We started by placing a mini cupcake on top of the regular size cupcake to create the "snowman".

Here are some in progress, we kind of made a combination of the ones in the pic. The scarf and the headband are made with Air Head candy molded into just the right shape by nuking them in the microwave for 15 seconds or so.
Selena, working hard!

And the kids waiting for their feast!
It was Mavericks birthday so this little guy was all dressed up for the occasion!
Mavericks cake! I love the little guy on the sled!!